

Laser cut edge quality is the finish, squareness, and cleanliness of the cut face a laser leaves behind, and it is the difference between a part that ships and a part that goes back for deburring. Good laser cut edge quality is not luck and it is not one magic setting. Almost every edge defect, whether it is dross on the bottom, striations down the face, or a burr you can feel with a thumb, traces back to one of four variables. Get those four right and the edge comes out clean. This guide walks through each one and how to fix the defect it causes.
Table of Contents
- What Laser Cut Edge Quality Actually Means
- The Four Variables Behind Almost Every Edge Problem
- Dross: Causes and Fixes
- Striations and a Rough Edge
- Burr on the Bottom Edge
- ISO 9013 and Measuring Edge Quality
- The Faster-Is-Better Myth
- Taper and Out-of-Square Edges
- How Material and Thickness Change the Edge
- When the Edge Problem Is the Machine, Not the Setup
- Dialing In a Clean Edge
- Frequently Asked Questions
Key Takeaways
- Laser cut edge quality comes down to four variables: focus, gas pressure, speed, and nozzle condition.
- Dross usually means too little gas pressure or wrong focus; striations mean too much speed.
- Burr on the bottom edge means too much heat for the gas to clear.
- ISO 9013 is the international standard that classifies thermal-cut edge quality.
- Faster is not always better; past the sweet spot, speed trades cycle time for rework.
What Laser Cut Edge Quality Actually Means
Laser cut edge quality describes how the cut face looks and measures once the part comes off the table. A high-quality edge is square to the top surface, smooth down the face, free of clinging dross on the bottom, and free of burr you have to grind off. A poor edge is some combination of rough, tapered, dross-coated, or burred, and every one of those costs you a secondary operation.
Why it matters is straightforward. Edge quality decides whether a part is ready to weld, fold, coat, or assemble straight off the laser, or whether it needs a deburring step first. Every part that needs touch-up is labor you did not quote and time the machine did not save you. Consistent laser cut edge quality is what makes laser cutting fast in practice, not just on paper.
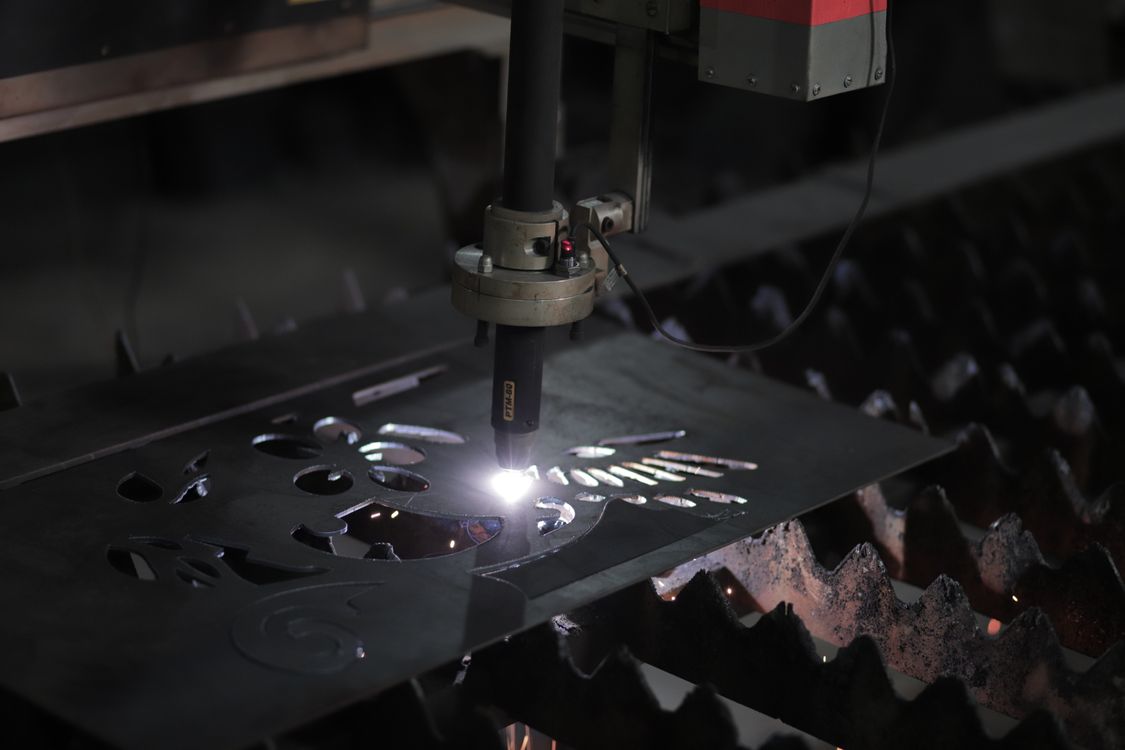
The Four Variables Behind Almost Every Edge Problem
When laser cut edge quality goes wrong, the cause is almost always one of four things. Learn to check these in order and you will solve most edge complaints in minutes instead of hours.
- Focus position: where the beam’s focal point sits relative to the material thickness.
- Assist-gas pressure and flow: what clears molten material out of the kerf.
- Cutting speed: how fast the head moves relative to power and thickness.
- Nozzle condition and alignment: whether the gas is delivered evenly and on center.
Notice what is not on that list: the source itself. A healthy fiber laser does not spontaneously start cutting badly. When the edge degrades, it is the process around the beam that drifted, and these four variables are where to look. The same four show up again in our guide to common laser cutting problems, because they are the root of most of them.
A worn or off-center nozzle is the variable shops overlook most, because it degrades slowly. The cut gets a little worse each day until someone finally checks the nozzle and finds it dinged or off center. Make nozzle condition the first thing you rule out when laser cut edge quality slips for no obvious reason.
Dross: Causes and Fixes
Dross is the molten material that resolidifies on the bottom edge of the cut instead of getting blown clear. It is the most common laser cut edge quality complaint, and it is almost always a gas or focus problem.
The usual causes are too little assist-gas pressure to evacuate the melt, a focus position set wrong for the thickness, or a cutting speed that does not match the power. The fixes follow the causes: raise gas pressure into the right range for the material, set focus correctly, and bring speed and power back into balance. A worn nozzle that disrupts the gas stream causes dross too, which is why nozzle checks come first.
Different metals behave differently. Stainless and aluminum cut with high-pressure nitrogen want clean, strong gas flow to leave a bright, dross-free edge, while mild steel cut with oxygen has its own balance of pressure and speed. The right assist gas choice and pressure is half the dross fight.
Striations and a Rough Edge
Striations are the vertical lines down the cut face. Some striation is normal, but heavy, dragging striations that roughen the lower edge are a laser cut edge quality defect, and they usually mean the cut is moving too fast for the material and power.
When speed outruns the process, the beam cannot fully penetrate and clear the kerf evenly, so the bottom of the edge lags and tears into rough lines. The fix is to back the speed down to where the edge cleans up, or to add power if the machine has it. Focus and gas play a part too, but on a rough, striated edge, speed is the first knob to reach for.
This is where the temptation to run fast bites shops. A higher feed rate looks like productivity until the parts come off needing rework. We come back to that trade in the section on the faster-is-better myth, because it is one of the most expensive habits in laser cutting.
Burr on the Bottom Edge
Burr is the ridge of resolidified material clinging to the bottom edge that you can catch with a fingernail. It is a laser cut edge quality defect that forces a deburring step, and it usually means there is too much heat in the cut for the assist gas to clear.
Common causes are excess power for the thickness, a speed that is too slow so heat builds, wrong focus, or insufficient gas to evacuate the melt cleanly. Dial power and speed back into balance, confirm focus, and make sure the nozzle is delivering full, centered gas flow. Burr and dross share a lot of root causes, so the same checks often fix both.
Thermal buildup is the thread connecting burr, taper, and part distortion. When too much heat goes into the part, the edge suffers and the part can move. Our guide to thermal stress and part distortion covers the heat side of this in depth, and it pairs naturally with chasing a clean edge.
ISO 9013 and Measuring Edge Quality
To talk about laser cut edge quality precisely, the industry uses a standard. ISO 9013 is the international standard for thermal cutting, including laser, and it classifies edge quality by measurable parameters rather than by eye. That matters when a customer specifies an edge tolerance, because it turns a vague “clean cut” into something both sides can measure and agree on.
The standard looks at things like the perpendicularity or angularity of the cut, meaning how square the edge is from top to bottom, and the roughness of the cut face. You do not need to memorize the standard to use it well. The point is that laser cut edge quality is a measurable, specifiable property, and trade references like The Fabricator walk through how the cutting variables map to those measured outcomes.
For everyday shop work, a caliper, a straightedge, and a trained eye catch most problems. For tight tolerance work, knowing the standard lets you quote and verify edges you can actually hold, instead of promising a finish and hoping.
The Faster-Is-Better Myth
The most expensive misconception in laser cutting is that a faster cut is always a more productive cut. Past the material and power sweet spot, more speed produces striations and incomplete penetration on the bottom edge, which forces a deburring or rework step. The rework time erases the cycle-time gain, and sometimes more.
Laser cut edge quality is a process window, not a maximize-the-feed-rate knob. The fastest useful speed is the one that still produces an edge you can ship, and pushing past it just moves the cost from the machine to the deburring bench. When you are setting up a job, find the speed that keeps the edge clean first, then stop. We cover the broader speed picture in our guide to fiber laser cutting speed.
Taper and Out-of-Square Edges
Taper is when the cut edge is not square, so the top and bottom of the cut are different widths and the face leans instead of standing straight. It is a laser cut edge quality problem that matters most on thicker material and on parts that have to fit or weld precisely, where a few degrees of lean throws off the assembly.
Taper usually points back to focus position and gas dynamics. A focal point set wrong for the thickness, or a nozzle that is off center and delivering gas unevenly, lets one side of the kerf cut differently from the other. The fixes are the familiar ones: confirm focus for the thickness, center the nozzle, and verify gas pressure. This is another reason nozzle condition sits so high on the laser cut edge quality checklist, because an off-center nozzle quietly tilts every edge it cuts.
On thin material taper is rarely a problem. As thickness climbs, the beam has more distance to stay square through, so focus and gas precision matter more. If your taper shows up only on heavy plate, start with focus and nozzle before you touch anything else.
How Material and Thickness Change the Edge
The same machine produces very different laser cut edge quality on different materials, and expecting one recipe to cover all of them is a common setup mistake. Mild steel, stainless, and aluminum each cut with their own balance of gas, pressure, and speed.
- Mild steel with oxygen: fast and efficient, but leaves an oxidized edge and wants its own pressure and speed balance.
- Stainless with nitrogen: clean, bright, oxidation-free edges, but needs strong, high-pressure gas flow and more power.
- Aluminum with nitrogen: reflective and heat-conductive, demanding on focus and gas to avoid dross and a ragged edge.
- Thicker sections of any metal: more power, slower speed, and tighter focus and gas control to stay square and clean.
This is why saved parameters matter. A clean edge on 10-gauge mild steel tells you nothing about how to cut quarter-inch stainless, so each material and thickness combination earns its own dialed-in recipe. Shops with strong laser cut edge quality keep a parameter library for the materials they run, built from cuts that actually came out clean, so nobody has to rediscover the settings on every job.
When the Edge Problem Is the Machine, Not the Setup
Most laser cut edge quality problems are process problems you can fix at the control. But sometimes the four variables all check out, the parameters are right for the material, and the edge still will not clean up. That is when the problem may be the machine itself rather than the setup.
A few signs point past the everyday process. Cut quality that degrades across the whole table, not just in one area, can mean a beam or head issue. A focus that will not hold, a head that shows inconsistent height sensing, or quality that drifts as the machine warms up can point to optics, alignment, or a cooling problem starving the source. A protective window that fogs again almost immediately after a fresh one goes in is telling you something upstream is wrong.
When laser cut edge quality will not respond to setup changes, stop guessing and bring in service before you burn through optics chasing it. Reger Laser troubleshoots exactly these cases, from stubborn cutting problems to head and source work. Knowing when to stop adjusting and start diagnosing is its own skill, and it saves both parts and time.
Dialing In a Clean Edge
Put it together and dialing in laser cut edge quality becomes a short, repeatable routine. When the edge is wrong, work the four variables in order rather than changing everything at once.
- Check the nozzle: round, centered, undamaged, correct type for the gas and material.
- Confirm focus position for the thickness you are cutting.
- Set assist-gas type and pressure for the material and finish you need.
- Adjust speed last, finding the fastest rate that still leaves a clean edge.
Change one variable at a time and watch the edge respond, because changing several at once tells you nothing about which one mattered. Write down the settings that produced a clean cut so you can repeat the job later. If the edge still will not clean up after the four variables check out, that is when it is worth bringing in service, because a persistent edge problem can point to a head or beam issue beyond the everyday process.
Frequently Asked Questions
What causes poor laser cut edge quality?
Poor laser cut edge quality almost always comes from one of four variables: focus position, assist-gas pressure, cutting speed, or nozzle condition. Dross points to gas or focus, striations point to too much speed, and burr points to too much heat for the gas to clear. Check the nozzle first, since it degrades slowly and is easy to overlook.
How do I get rid of dross on the bottom edge?
Dross usually means too little assist-gas pressure, a wrong focus position, or a speed that is out of balance with power. Raise gas pressure into the right range, set focus correctly for the thickness, balance speed and power, and confirm the nozzle is clean and centered. The right assist gas also matters for a dross-free edge.
What is ISO 9013?
ISO 9013 is the international standard for thermal cutting, including laser cutting, that classifies edge quality by measurable parameters like edge squareness and surface roughness. It lets a shop and a customer specify and verify an edge tolerance instead of arguing over a vague description of a clean cut.
Is a faster cut always better?
No. Past the sweet spot for the material and power, more speed produces striations and incomplete penetration, forcing a deburring step that erases the time you saved. The fastest useful speed is the one that still leaves an edge you can ship. See our cutting speed guide for the full picture.
Get Clean Edges Off the Table, Every Time
If laser cut edge quality is costing you a deburring step, Reger Laser can help you dial it in or service the machine behind it. Clean edges off the table mean less rework, faster throughput, and parts that ship the first time. See our service options or reach out and we will help you get clean cuts the first time.


