
Reger Laser

Buying & Ownership

Buying, operating cost, and ownership of fiber laser machines.

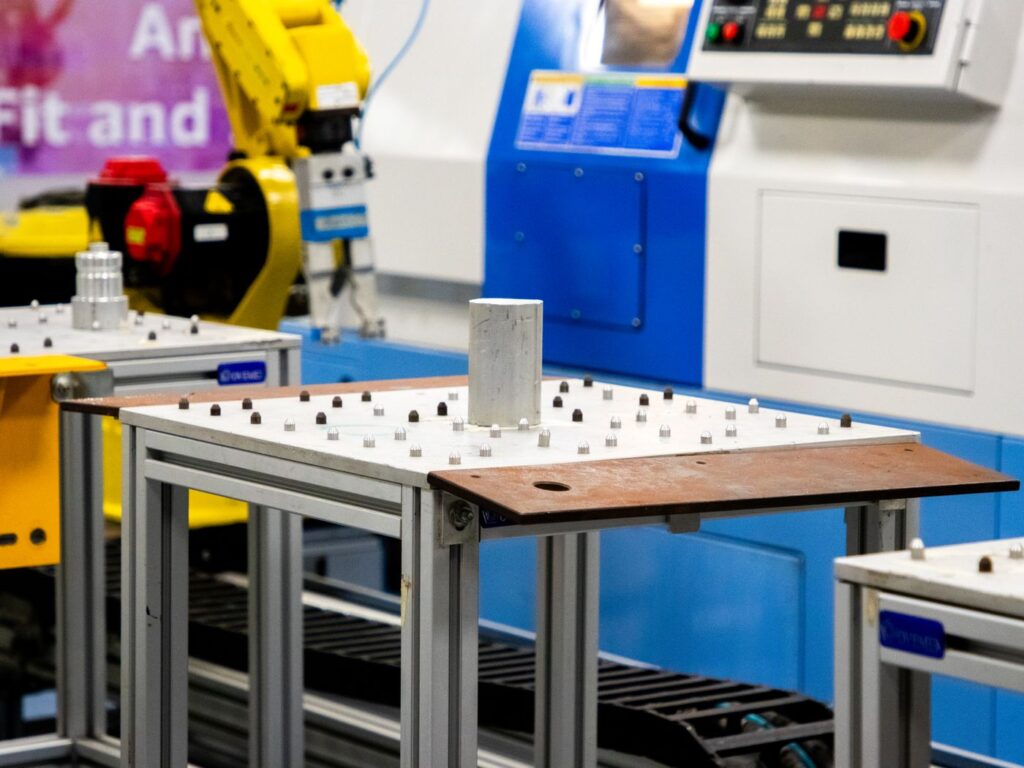
Robotic arm working alongside industrial machinery, one form of automation shops add to a laser cutting cell
Buying & Ownership, Laser Cutting

Should a Small Shop Automate Its Laser Cutting? 6 Questions to Answer First

A small shop should automate laser cutting when the laser is sitting idle while people load sheets, pull parts, and sort skeletons, and when there is enough steady work to keep an automated cell busy. If the beam is off more than it is on during a shift because the operator is handling material, automation usually pays off in capacity. If the machine is already cutting most of the shift and the real bottleneck is bending, welding, or programming, automating the laser just moves parts faster to a pile that is already waiting. The decision is less about the technology and more about where time is actually lost in your shop. This guide walks through six questions that sort that out, the common types of laser automation, and what to plan for so an automated cell runs the way you expected it to. Table of Contents What It Means to Automate Laser Cutting Question 1: Where Is the Time Going? Question 2: Is There Enough Steady Work? Question 3: How Do You Schedule? Question 4: Do You Have the Space? Question 5: Who Will Run and Maintain It? Question 6: Is the Laser Itself Ready? Frequently Asked Questions What It Means to Automate Laser Cutting Reger Laser sells and supports laser cutting machines and the automation around them, and when shops ask us about automation they usually mean one of a few things. Most cells combine several of these. Load and unload systems that move raw sheets onto the shuttle table and pull cut sheets off. Material storage towers that hold multiple materials and thicknesses and feed the laser from a queue. Part sorting that picks finished parts out of the skeleton and stacks them, like our PMG parts picker. Software for nesting, scheduling, and tracking jobs through the cell. The right mix depends on the answers to the questions below. Our laser cutting automation page covers the systems we offer. Question 1: Where Is the Time Going? Start by measuring, not guessing. For a week or two, track how much of each shift the laser is actually cutting and how much it is waiting. Most controls log beam-on time or cycle time, and a simple sheet at the machine can capture the rest: waiting for material, loading, unloading, sorting parts, clearing a jam, changing nozzles. If loading, unloading, and sorting eat a large share of the shift, automation targets exactly that time. If the laser is mostly cutting and parts pile up downstream, your money is better spent downstream. Our post on fiber laser downtime covers how to find and fix the other sources of lost time, because some of them can be solved without any automation at all. Question 2: Is There Enough Steady Work? Automation earns its keep on volume. A cell that sits idle half the week because the work is not there is an expensive way to store sheet metal. Look at your backlog and your quoting pipeline, not just a busy month. Shops with steady repeat work, recurring customers, or their own product lines tend to get the most from it. Job size matters too. Automation handles long runs of the same material effortlessly. It also handles high-mix work well if the software and storage are set up for it, but that setup takes more planning. A useful exercise is to look back over the last year and ask how many weeks the laser would have been fully loaded with an automated cell in place. If the answer is most of them, the case for automation is strong. If the work comes in bursts with long quiet stretches between, it may make more sense to add a shift or improve nesting and scheduling first, and revisit automation once the workload is steadier. The goal is a cell that stays busy, not one that looks impressive on the floor. Question 3: How Do You Schedule? One of the biggest gains from automation is the ability to keep cutting when nobody is standing at the machine: through breaks, shift changes, and in some shops, unattended overnight. That only works if the shop plans for it. Somebody has to program and nest enough work to fill those hours, stage the material, and trust the machine to run. Nesting quality gets more important when the cell is feeding itself. Our laser cutting nesting post covers how to get more parts out of every sheet, which matters twice as much when those sheets are coming out of a tower without a person checking them. Question 4: Do You Have the Space? Automation takes floor space, and not just for the equipment itself. You need room for forklifts or cranes to load raw material, room for finished parts and skeletons to leave the cell, and room for technicians to reach every side for service. Some storage systems also need ceiling height. Sketch the whole material flow, from the dock to the next operation, before choosing a system. A cell that fits on paper but blocks the path to the press brakes creates a new bottleneck. Question 5: Who Will Run and Maintain It? Automation changes jobs rather than removing them. Someone still programs the work, stages material, handles exceptions, and keeps the equipment maintained. Suction cups, sensors, and grippers are wear items, and an automated cell adds moving parts that need a place on the maintenance schedule. Guarding also changes, because moving loaders and pickers create new hazards around the machine. OSHA’s machine guarding guidance applies to the whole cell, not just the laser. If your team is stretched, plan for training before the equipment arrives. Small manufacturers can also get outside help planning the change. The NIST Manufacturing Extension Partnership has centers in every state that work with small and mid-sized shops on process and productivity improvements. Question 6: Is the Laser Itself Ready? Automation multiplies whatever the laser already does. A machine with inconsistent cut quality, frequent pierce failures, or tip-ups will produce those problems faster and

Industrial laser cutting machine installed on a factory floor, the kind of machine that has to be re-leveled and realigned after a move
Buying & Ownership, Maintenance & Service

How Do You Move a Laser Cutting Machine Without Losing Alignment?

Moving a laser cutting machine safely comes down to three things: planning the move before anyone touches a bolt, protecting the optics, motion system, and cooling loop during transport, and treating the reinstall as a full commissioning job instead of a plug-in. A laser that is rolled across a building or trucked across the country can arrive looking perfect and still cut out of square, because the frame settled differently, the gantry shifted on its rails, or the beam is no longer centered in the nozzle. Skipping any of those three steps is how a planned two-week move turns into a month of chasing cut quality. This guide walks through what to plan, how the machine should be prepared and rigged, what has to be finished at the new site before the machine shows up, and how it should be leveled, aligned, and tested before production parts go back on the table. Table of Contents Why Moving a Laser Cutting Machine Is Different Planning the Move Before Anyone Touches a Bolt Preparing the Machine for Transport Rigging and Transport Getting the New Site Ready Leveling, Alignment, and Test Cuts Frequently Asked Questions Why Moving a Laser Cutting Machine Is Different From Moving Other Equipment Reger Laser relocates laser cutting machines for shops that are expanding, consolidating buildings, or buying a machine out of another facility. The part most people underestimate is not the weight. It is the precision. A fiber or CO2 laser holds positional accuracy across a large bed because its frame, rails, and gantry were leveled and aligned to each other when it was installed. Lift it, set it down somewhere else, and that relationship changes. That is why a laser move has more in common with a new installation than with moving a saw or a press brake. The machine needs the same site preparation, the same utilities, and the same commissioning checks it needed on day one. Our post on fiber laser installation requirements covers the site side in detail, and most of that list applies again when the machine changes buildings. What goes wrong in a poorly planned move The frame twists because it was lifted at the wrong points or set down on an uneven floor. Rails, racks, and gantry components get damaged because the axes were not locked for transport. Dust and debris get into the beam path because the cutting head and openings were left uncovered. Lines and heat exchangers freeze and crack because coolant was left in the system during a cold trip. Cutting tables and machine settings are lost because the control was never backed up before power was pulled. None of these are rare, and every one of them is preventable with a written checklist and the right people on site for each stage. Planning the Move Before Anyone Touches a Bolt Good moves start weeks ahead. The first document to pull is the machine manual, because the manufacturer specifies the lifting points, the transport locks, and the order components should come apart. The second is a floor plan of the new location with the machine footprint, the service clearances, and the path from the dock to the final position drawn in. Doorways, turns, and overhead obstructions along that path decide whether the machine moves in one piece or several. Questions to answer during planning Does the floor at the new location meet the manufacturer’s slab and flatness requirements? Is the electrical service at the new location the correct voltage and capacity, with a disconnect installed? Where will the chiller, dust collector, and assist gas supply sit, and how long are the new runs? Will the machine travel as one piece, or come apart into bed, gantry, source, and controls? Who is rigging, who is disconnecting and reconnecting utilities, and who is doing the realignment? How long can the shop run without this machine, and where does the work go in the meantime? That last question matters more than most people expect. Planning the downtime window honestly, including time for alignment and test cuts, keeps a move from turning into a scramble. If the laser feeds automation such as a parts picker, plan that equipment into the same window, because it has to be reconnected and recalibrated to the machine as well. Preparing the Machine for Transport Preparation is where most of the risk comes out of a move. Before the machine is disconnected, run it, cut reference parts, and write down how it performs. That baseline gives you something to compare against after the reinstall, and it documents the machine’s condition in case anything is damaged in transit. A basic preparation sequence Back up the control: programs, cutting tables, parameters, and machine settings. Cut and keep reference parts in a common material and thickness, and note any existing issues. Drain the chiller and every cooling circuit in the machine, and blow the lines out if the trip passes through freezing weather. Remove or cap the cutting head and seal every opening in the beam path. Install the manufacturer’s transport locks on the gantry and axes. Disconnect and label every electrical, gas, and exhaust connection. Clear loose items, scrap, and slats from the shuttle tables. Draining coolant is the step that gets skipped most often, and it can be the most expensive one to skip. Water left in a laser source, a cutting head, or a chiller heat exchanger during a cold trip can freeze and crack components that take weeks to replace. Our laser chiller maintenance guide covers draining and refilling in more detail. Rigging and Transport A laser cutting machine should be lifted only at the points the manufacturer designates, with rigging rated for the load, by people trained to do it. Lifting at the wrong point, or letting the bed flex during a lift, is how frames get twisted. OSHA publishes guidance on crane, derrick, and hoist safety and on powered industrial trucks, and a qualified rigging company will work to those standards on your

Buying & Ownership, Laser Cutting, Training & Safety

An In-Depth Guide to Operating and Understanding Tanaka Laser Cutters

The Ultimate Guide to Tanaka Laser Cutters: Precision Meets Performance Tanaka laser cutters have become a household name in the world of precision cutting, renowned for their reliability, accuracy, and innovation. Whether you’re in manufacturing, engineering, or crafting, Tanaka laser cutters provide a seamless solution to meet your cutting needs. In this blog, we’ll explore the features, benefits, and applications of Tanaka laser cutters, helping you make an informed decision for your business. Why Choose Tanaka Laser Cutters? Tanaka laser cutters are known for their unparalleled precision. They utilize advanced technology to achieve micrometer-level accuracy and ensure flawless cuts every time. They offer wide material compatibility, handling everything from metals like steel and aluminum to non-metals like wood and acrylic with ease. These machines are designed for efficiency and speed, with optimized cutting paths and high-powered lasers that reduce production time without compromising quality. Additionally, Tanaka’s eco-friendly solutions align with sustainable manufacturing practices by minimizing material wastage and enhancing energy efficiency. Key benefits of choosing Tanaka laser cutters include: Key Features of Tanaka Laser Cutters Tanaka laser cutters are equipped with advanced features that make them stand out in the industry. They boast high-powered lasers capable of cutting through thick materials while maintaining fine detail. Their user-friendly interfaces, featuring intuitive control panels and software, ensure accessibility for both beginners and experienced professionals. Built with robust materials and cutting-edge engineering, these machines are durable and designed to last. Additionally, customizable settings allow users to tailor cutting parameters to suit specific projects and materials, ensuring versatility and precision. Key features include: Applications of Tanaka Laser Cutters These machines cater to a variety of industries, making them an essential tool for numerous applications. In the automotive industry, Tanaka laser cutters are used to cut components and do precision work. The aerospace sector benefits from its ability to cut lightweight yet durable materials with high precision. Signage and advertising professionals rely on Tanaka to create intricate designs and lettering. Artists and designers use these cutters to bring their visions to life through precise cuts and engravings, while jewelers craft delicate and detailed designs in precious metals with ease. Industries using Tanaka laser cutters include: Tips for Maximizing Efficiency with Tanaka Laser Cutters Regular maintenance is key to getting the most out of your Tanaka laser cutter. Cleaning lenses and mirrors and checking for software updates ensure consistent performance. Choosing materials Tanaka recommends will yield the best results, while proper training for your team helps unlock the machine’s full potential. Additionally, installing proper ventilation systems to handle fumes and debris generated during cutting will enhance safety and efficiency. Tips include: What Customers Are Saying Customers worldwide have praised Tanaka laser cutters for their transformative impact on various industries. Sarah L., a manufacturing engineer, noted, “Switching to a Tanaka laser cutter transformed our production line. The precision and speed are unmatched!” Marco R., a designer, shared, “As an artist, I rely on tools that deliver intricate details. Tanaka never disappoints.” James K., an operations manager, stated, “We’ve significantly reduced material waste since implementing Tanaka’s eco-friendly solutions.” Where to Buy Tanaka Laser Cutters If you’re ready to invest in a Tanaka laser cutter, there are several options to consider. Authorized dealers offer genuine products and warranties, ensuring peace of mind with your purchase. Reputable e-commerce platforms often feature Tanaka laser cutters with detailed specifications and customer reviews, making it easier to compare options. Additionally, visiting trade shows and expos allows you to see live demonstrations and consult with experts before making a decision. You can purchase from: Conclusion Tanaka laser cutters are a game-changer for anyone seeking precision, reliability, and efficiency in cutting and engraving. By investing in this advanced technology, you’re not just upgrading your tools – you’re empowering your business to achieve new heights. Discover the difference Tanaka laser cutters can make. Whether you’re crafting intricate designs or manufacturing industrial components, these machines are your trusted partner for success. Website design, hosting, and SEO done by datafanatics.com

Flat bed fiber laser cutting machine installed on a shop floor in a fabrication facility
Buying & Ownership, Maintenance & Service, Training & Safety

What Does a Fiber Laser Need to Be Installed? 7 Requirements to Check First

Fiber laser installation requirements come down to seven things: adequate and clean electrical service, dry compressed air, an assist gas supply, heat rejection through a properly sized chiller, a flat and solid floor, enough clearance for the machine plus material handling, and fume extraction with the right safety setup. Sort those out before the truck arrives and a machine goes from crate to first cut in a matter of days. Miss one and the machine sits. Most delayed installs we see are not machine problems. They are facility problems that nobody checked until the rigger was already on site. Below is what to verify, in the order it matters, with the questions to put to your electrician and your dealer well before the ship date. Table of Contents The Short Answer on What a Fiber Laser Needs A fiber laser is not a plug-in tool. It is a system that pulls significant three phase power, needs compressed air at a specified pressure and dryness, consumes assist gas, rejects a large amount of heat into a chiller, and has to sit dead flat and stay that way. It also needs room around it for sheets going in and parts coming out, and it produces fume that has to be captured. Every machine model publishes its own numbers for all of this. Do not work from a rule of thumb you read somewhere, and do not assume a new model matches the machine it replaced. Get the specification sheet for the exact machine and configuration you are buying, hand it to your electrician and your air and gas suppliers, and let them tell you what has to change. That is the whole job, and it is straightforward when it happens twelve weeks out instead of the week of delivery. What follows is the checklist to work through, and what tends to go wrong in each area. Requirement 1: Electrical Service and Power Quality This is the most common reason a fiber laser installation slips. A modern fiber laser plus its chiller and dust collector represents a serious load, and a lot of shops discover their existing service does not have the headroom once everything runs at once. Four things to confirm before ordering anything. First, the incoming service capacity, meaning whether there is enough amperage available at your panel with everything else in the shop running, not just on paper. Second, the voltage and phase the machine expects, since a mismatch means a transformer, and a transformer means lead time and floor space. Third, the disconnect and breaker sizing and where the disconnect has to be located relative to the machine. Fourth, grounding, which fiber lasers are particular about because the drives and the controller are sensitive to a poor ground. Power quality matters as much as capacity. Voltage sag when a large compressor kicks on, harmonic distortion from other drives in the building, and phase imbalance all cause faults that look like machine problems and are not. If your shop has a history of nuisance faults on other CNC equipment, get a power quality survey done before the laser lands rather than chasing it afterward. Work from the National Electrical Code and let a licensed electrician size the installation. One practical note: run the conduit and set the disconnect before the machine arrives. Riggers can place a machine in a morning. Waiting on an electrician afterward costs days. Requirement 2: Clean, Dry Compressed Air Compressed air runs the cutting head, the nozzle changer, the pneumatics, and on many machines it doubles as an assist gas for thinner material. It has to arrive at the pressure the machine specifies and it has to be dry. Dryness is where shops get hurt. Ordinary shop air carries water and compressor oil. Send that into a cutting head and you contaminate the protective window, which then absorbs energy, overheats, and fails, sometimes taking more expensive optics with it. The fix is a refrigerated or desiccant dryer sized for your actual air demand, plus coalescing filtration, plus a drain that works. Check the machine specification for the required dew point and filtration level and match it exactly. Volume is the second issue. A compressor that keeps up with hand tools may not keep up with a laser running air assist continuously. Size for the machine demand plus everything else in the shop running at the same time, and give it a receiver tank so short peaks do not drag the pressure down. Air quality problems show up as consumable cost first. If you are burning through protective windows and nozzles faster than expected, air is the first place to look, ahead of nozzle condition or cutting parameters. Requirement 3: Assist Gas Supply and Storage Assist gas is a facility decision, not just a consumable line item, because how you supply it changes what has to be built before the machine runs. Nitrogen for oxide free edges on stainless and aluminum, oxygen for thicker carbon steel, and air for lighter gauge each have different supply implications. High pressure cylinders are the simplest starting point and the most expensive way to run volume. Bulk liquid means a tank outside, a pad, a vaporizer, and a supplier agreement. On site nitrogen generation means a generator, more compressed air demand, and attention to purity, since nitrogen purity directly affects edge quality on stainless. Whichever route you choose, the piping run to the machine has to be sized for the flow the cutting head demands at pressure. Undersized line is a classic mistake: pressure reads fine at the manifold with the machine idle, then drops the moment cutting starts, and the edge quality goes with it. Regulators, manifolds, and cylinder or tank location all need to be settled before the install date, and outdoor bulk storage frequently involves a permit and a lead time measured in weeks. If you are still deciding, our breakdown of assist gas selection covers the tradeoffs between nitrogen, oxygen, and air by material and thickness.

Scroll to Top
0

No products in the cart.

No products in the cart.