Reger Laser

Maintenance & Service

Preventative maintenance, repair, and service for fiber laser machines.

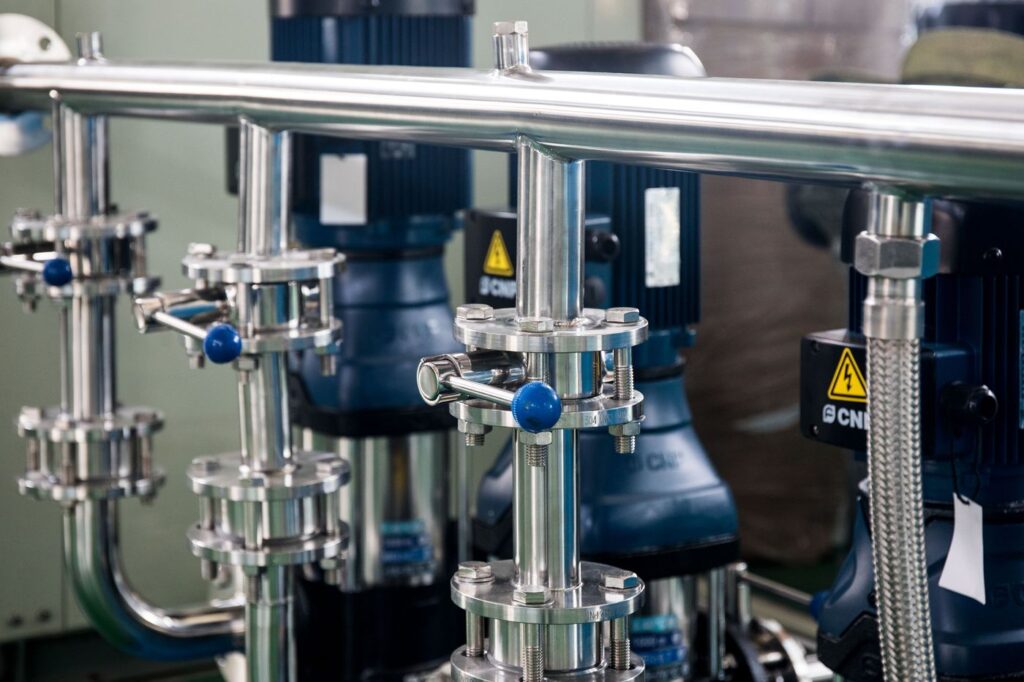
Steel process pipes in a factory building, the type of plumbing that carries coolant between a laser chiller and the machine
Maintenance & Service, Orion Chillers

What Coolant Should You Use in a Laser Chiller?

The right laser chiller coolant is whatever the laser manufacturer specifies for your machine, and for most fiber and CO2 cutting machines that means distilled or deionized water, sometimes with a specific corrosion inhibitor or biocide the manufacturer approves. It almost never means tap water, and it only means antifreeze when the manual says so and at the concentration the manual gives. The reason is simple. The coolant does not just pass through the chiller. It runs through the laser source, the cutting head, and in some machines the optics, and the passages in those parts are small, expensive, and hard to clean. Minerals, corrosion, and biological growth that a garden hose would never notice can scale a heat exchanger, clog a head, or trip a conductivity alarm. This guide explains what the coolant does, why water quality matters so much, what to avoid, and how to keep the loop clean between services. Table of Contents What Laser Chiller Coolant Actually Does Why Water Quality Matters Distilled, Deionized, or Tap Water? When Antifreeze and Additives Belong How Often to Change the Coolant Signs the Coolant Needs Attention Frequently Asked Questions What Laser Chiller Coolant Actually Does Reger Laser sells and services Orion industrial water chillers and supports the laser cutting machines they cool, so we see the inside of a lot of cooling loops. The job of the coolant is to carry heat away from the parts of the laser that make it: the source or resonator, the cutting head, and the beam delivery optics. The chiller removes that heat and sends the coolant back at a controlled temperature. Many fiber lasers run two circuits at different temperatures, one for the source and one for the head and optics. Both circuits depend on clean coolant flowing freely. If flow drops or the coolant carries contamination, the source and optics run hotter than they were designed to, and that shortens their life even when no alarm goes off. Why Water Quality Matters Three things go wrong in a cooling loop, and all three start with what is in the water. Scale Tap water carries dissolved minerals, mostly calcium and magnesium. The U.S. Geological Survey’s page on water hardness explains how those minerals leave deposits when water is heated. In a laser, those deposits coat heat exchanger surfaces and narrow the small channels in the cutting head and source, which cuts heat transfer and flow. Conductivity and corrosion Dissolved minerals also make water conduct electricity. USGS covers the basics in its page on conductivity and water. Many lasers monitor coolant conductivity because high conductivity speeds up corrosion in mixed-metal loops and can be a problem around electrical components. That is why some machines use a deionizing filter in the loop and alarm when conductivity climbs. Biological growth Warm water, light, and time grow algae and bacteria. The slime they form clogs filters and strainers, coats heat exchanger surfaces, and can foul small passages. Clear tubing and reservoirs that sit in light make it worse. Distilled, Deionized, or Tap Water? Follow the manual first. Beyond that, here is how the common options compare in general. Distilled water has most of the minerals removed, so it does not scale the way tap water does. Many manufacturers specify it. Deionized water has dissolved ions removed and very low conductivity. Very pure water can be aggressive toward some metals over time, which is why manufacturers that specify it often pair it with an approved inhibitor or a deionizing filter that holds conductivity in a set range. Tap water varies from town to town and even season to season. It brings minerals, chlorine, and whatever else is in the local supply. Keep it out of the loop, including for top-offs. The most common mistake we see is not the initial fill. It is the top-off. A loop filled correctly and then topped off with tap water for a year ends up with most of the problems tap water brings. Keep a supply of the right water next to the chiller so nobody is tempted. When Antifreeze and Additives Belong Antifreeze is the additive people ask about most. Glycol protects against freezing, which matters if the chiller or lines sit where temperatures drop below freezing, or if the machine will be moved or stored in the cold. But glycol also changes how well the coolant carries heat, and not every laser allows it. Some manufacturers approve a specific product at a specific concentration. Others do not allow it at all. The same rule applies to corrosion inhibitors and biocides. Use only what the manufacturer approves, at the ratio it specifies, and never mix products from different suppliers. Additives that are fine on their own can react with each other or with seals and hoses in ways that are hard to undo. If your shop has winterized a chiller in the past, or you are not sure what is in the loop right now, drain, flush, and refill with a known coolant rather than guess. How Often to Change Laser Chiller Coolant The manual gives the interval, and it is usually based on run time or calendar time, whichever comes first. Treat it as a maximum, not a target. Shops in dusty environments, shops that run multiple shifts, and shops where the chiller sits in a warm or bright spot often need to change coolant sooner. A full change should include flushing the loop, not just draining and refilling, along with replacing filters and checking the deionizing cartridge if the system has one. Our laser chiller maintenance guide covers the full procedure, and we handle chiller flushing as part of our preventive maintenance visits. Signs the Coolant Needs Attention The coolant looks cloudy, colored, or has particles in it. There is visible growth in the reservoir, sight glass, or clear tubing. Conductivity alarms appear or the deionizing cartridge is exhausting faster than it used to. Filters and strainers clog between scheduled changes. Flow or pressure readings are drifting,
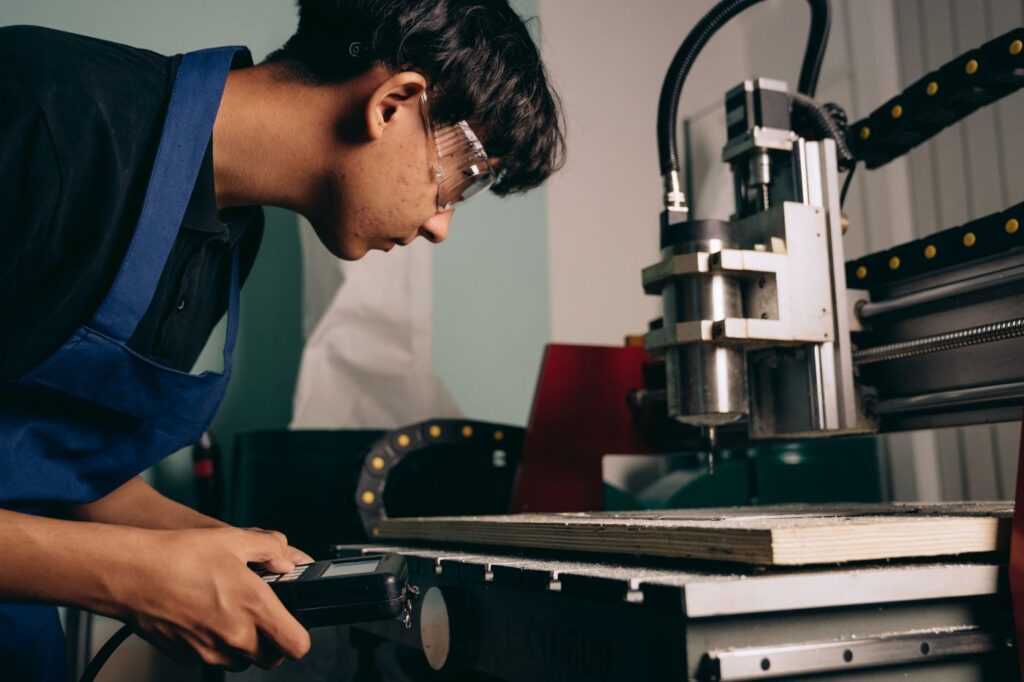
Machine operator wearing safety glasses while running equipment, the person who owns the laser shift start checklist
Maintenance & Service, Training & Safety

What Should a Laser Operator Check at the Start of Every Shift?

A good laser cutter daily checklist covers five areas before the first program runs: safety systems, the cutting head and optics, assist gas, cooling, and the table and motion system. Once an operator has done it a handful of times it becomes a short routine, and it catches most of the problems that otherwise show up halfway through a nest as dross, a burned protective window, a pierce that will not go through, or a head collision. The shops we see with the fewest emergency calls are not the ones with the newest machines. They are the ones where every operator checks the same things in the same order at the start of every shift. The checklist below is a starting point built from the service calls we get most often. Adjust it to your machine’s manual, post it at the control, and make it part of how every new operator is trained. Table of Contents Why a Laser Cutter Daily Checklist Matters Safety Systems Cutting Head and Optics Assist Gas Chiller and Cooling Tables, Slats, and Motion End of Shift Making the Checklist Stick Frequently Asked Questions Why a Laser Cutter Daily Checklist Matters Reger Laser services and supports fiber and CO2 cutting machines for fabrication shops across the country, and a lot of the repairs we do trace back to something that was visible at the start of the shift. A window with a spatter mark. A nozzle with a nick. A chiller running a few degrees warm. Gas pressure a little low because a bottle was near empty. Each of those is a two-minute fix before the first cut and a much bigger problem after a few hours of production. A daily checklist also makes a shop less dependent on one experienced operator. When the routine is written down, the second shift and the new hire check the same things the veteran does. That consistency is the whole point of the operator training we provide, and it is the foundation of any preventative maintenance program. Safety Systems Start with the things that protect people, because a machine that cuts perfectly with a bypassed interlock is not a machine anyone should run. Walk the machine and confirm guards, enclosure panels, and viewing windows are in place and undamaged. Test the emergency stops and confirm door and light curtain interlocks stop the machine. Confirm the fume extraction or dust collector is running and not alarming. Clear the area around the machine of scrap, tools, and anything that could trip someone or catch fire. Confirm a fire extinguisher is in its place and charged. OSHA’s guidance on machine guarding and its laser hazards overview are good references for why these checks matter. The laser beam in most cutting machines is infrared and invisible, so the enclosure and interlocks are what keep it where it belongs. Cutting Head and Optics The cutting head is where most daily problems start, and it is the area most worth a careful look. Protective window. Inspect it under good light for haze, pits, or burn marks, and replace it if you see any. Our guide to the laser protective window covers what to look for. Nozzle. Check the orifice for spatter, nicks, and roundness, and confirm it is seated tight. See our laser cutting nozzle guide for how damage shows up in the cut. Beam centering. Run a centering check if the machine or the nozzle has been changed or bumped. Height sensing. Calibrate the capacitive height sensor after a nozzle change, and confirm it responds. Focus. Confirm focus settings match the material in the first program. Assist Gas Assist gas problems look like cutting problems, so they are easy to misdiagnose. Checking supply before the first cut saves a lot of confusion later. Confirm there is enough oxygen, nitrogen, or air on hand for the shift’s jobs. Check that supply pressure at the regulator matches what the machine needs. Listen for leaks at fittings and hoses, and look for damaged lines. If the shop uses compressed air as an assist gas, drain the separators and confirm the dryer is working, because oil and water in the air end up on the optics. Our assist gas guide explains how each gas affects the cut and what purity and pressure problems look like on the part. Chiller and Cooling Confirm the chiller is running and holding its set temperature before the source is turned on. Check the coolant level and look for leaks under the chiller and along the lines. Confirm the condenser and filters are not clogged with dust. Note any chiller alarms, even ones that cleared on their own. A chiller that runs warm will not always stop the machine right away, but it shortens the life of the source and the optics. If the chiller is struggling, our post on why a laser chiller overheats walks through the usual causes. Tables, Slats, and Motion Look at the slats. Heavy slag buildup lifts sheets, causes tip-ups, and leads to collisions. Confirm the shuttle tables move freely and nothing is caught in the exchange path. Clear scrap from the bed and the conveyor or scrap bins. Home the machine and listen for new noises from the axes as it moves. Check the drive rails for debris that could reach bearings and racks. End of Shift The last five minutes of a shift set up the next one. Clean the head area, empty scrap bins, note anything unusual in a machine log, and report problems instead of leaving them for the next operator to discover. A shared log turns a vague complaint like “it has been cutting funny” into something a technician can actually diagnose. A good end-of-shift log does not need to be elaborate. Record the date, the operator, the materials cut, any alarms, any consumables changed, and anything that sounded, looked, or cut differently than usual. Over a few months that log becomes one of the most useful tools a technician has, because

Industrial laser cutting machine in operation, where a weak resonator shows up first as slower cutting and inconsistent edges
Laser Cutting, Maintenance & Service

What Are the Signs a CO2 Laser Resonator Needs Repair?

A CO2 laser resonator usually needs service when the machine starts losing power it used to have: cuts that need slower speeds or higher power settings to get through the same material, output that drifts during a shift, alarms tied to vacuum, gas, or discharge, or a blower that sounds different than it did last month. Those symptoms rarely fix themselves. The resonator is the heart of a CO2 cutting machine, and most of what goes wrong inside it, from worn blower bearings to hardened O-rings to contaminated internal mirrors, gets worse with every hour it runs. The good news is that most resonator problems are repairable, and catching them early keeps a routine overhaul from turning into a major rebuild. This guide covers how a CO2 resonator works, the warning signs to watch, what typically fails, and how to decide between repairing the resonator and replacing the machine. Table of Contents How a CO2 Laser Resonator Works Warning Signs a Resonator Needs Service What Usually Fails Inside a CO2 Resonator Checks to Make Before Calling Service Repair the Resonator or Replace the Machine? Keeping a Resonator Healthy Frequently Asked Questions How a CO2 Laser Resonator Works Reger Laser services CO2 and fiber cutting machines from Tanaka, Mitsubishi, Trumpf, Bystronic, Amada, and other manufacturers, and a large share of our CO2 work happens inside the resonator. Knowing the basics of how it works makes the warning signs much easier to read. A CO2 resonator creates the beam by running an electrical discharge through a laser gas mixture made mostly of helium and nitrogen, with a smaller share of carbon dioxide. A blower, either a turbo blower or a roots blower depending on the design, circulates that gas through the discharge area and through heat exchangers that pull the heat back out. Mirrors at each end, including the rear mirror and the output coupler, bounce the light back and forth until it leaves as a usable beam. A vacuum pump holds the gas at the right pressure, and fresh gas is fed in as the machine uses it. Every one of those parts has to be working for the resonator to produce stable, full power. When one of them starts to wear, the machine often compensates for a while. Then it stops compensating, and the problem shows up on the parts. Warning Signs a Resonator Needs Service Lost cutting power. Settings that cut a thickness cleanly last year now need slower speeds or more power. Drifting output. Edge quality changes from part to part or from morning to afternoon without any change to the program. More alarms. Vacuum, gas pressure, discharge, or blower alarms that used to be rare are becoming routine. Slow startup. The resonator takes longer to pump down and reach a ready state. New noise or heat. The turbo or roots blower sounds, vibrates, or runs hotter than it used to. Higher gas use. Laser gas bottles are running out sooner, which often points to a leak. Changed beam mode. A mode burn looks different, or cut quality problems survive a new lens and nozzle. Any one of these is a reason to look closer. Two or more together usually means the resonator is overdue for attention. Before blaming the resonator, though, rule out the simple causes first. A dirty lens, a damaged nozzle, or bad assist gas can look a lot like a weak resonator, and many of the checks in our cut quality troubleshooting post apply to CO2 machines as well. What Usually Fails Inside a CO2 Resonator Turbo and roots blowers The blower runs at high speed for every hour the resonator is on, so its bearings are a wear item. Worn bearings show up as noise, vibration, and heat, and a blower that is run to failure can damage other components on its way out. A scheduled blower overhaul replaces the wear parts before that happens. Discharge tubes and O-rings O-rings seal the gas path, and heat and age harden them until they crack. A leaking seal lets air into the laser gas, which destabilizes the discharge, raises gas consumption, and cuts power. Discharge tubes also collect deposits over time. Replacing O-rings and servicing the tubes is one of the most common resonator jobs we do. Internal optics The rear mirror, output coupler, and folding mirrors inside the resonator slowly collect contamination. Dirty internal optics absorb energy, lower output, and distort the beam mode. An internal cleaning restores them when the damage has not gone too far. Vacuum pump and power supply A tired vacuum pump shows up as slow pump-down and pressure alarms. Power supply faults show up as unstable discharge or alarms that point to the electrical side. Both are repairable, and both are easier to diagnose when the shop has kept notes on when the symptoms started. Checks to Make Before Calling Service Some groundwork on your side makes a service visit faster and the diagnosis more accurate. None of it involves opening the resonator. A CO2 resonator carries high voltage, and its beam is invisible infrared light that can injure eyes and skin. OSHA’s laser hazards overview and the OSHA Technical Manual chapter on laser hazards explain why internal resonator work belongs to trained technicians. Clean or replace the external optics and nozzle, and confirm focus, so they are ruled out. Check the assist gas and laser gas supply for correct pressure and purity. Confirm the chiller is holding its set temperature. Our chiller overheating post covers the common causes. Pull the alarm history and write down when each symptom first appeared. Note how long the resonator takes to reach ready, and how quickly laser gas is being used. Should You Repair the CO2 Laser Resonator or Replace the Machine? This is the question behind most resonator calls, and the answer depends on more than the resonator. Look at what actually failed and whether parts are available for it. Look at the rest of the machine: the motion system,

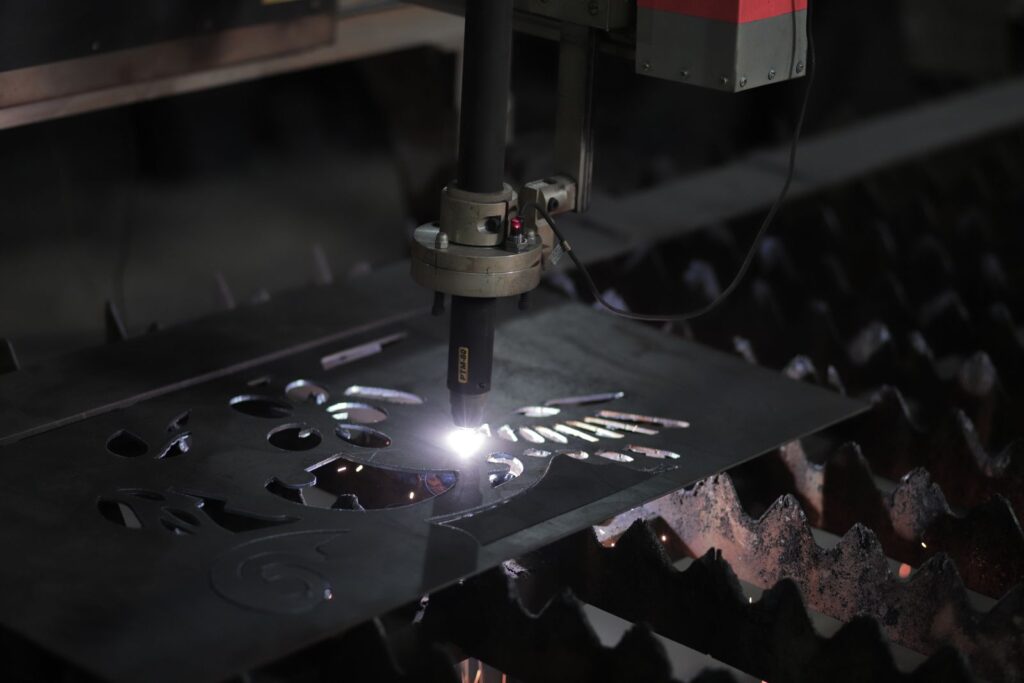
Cutting head over a steel sheet with a bright plasma of light at the nozzle tip
Maintenance & Service, Parts & Consumables

Laser Protective Window Replacement: 5 Signs It Is Done and How to Make Each One Last Longer

A laser protective window is the sacrificial glass that sits between the cutting head’s focusing optics and the nozzle, and it should be inspected every shift and replaced the moment it shows contamination, pitting, or a burn mark, not on a fixed calendar. In a shop cutting mild steel with oxygen, that often means a new window every one to two weeks. In a shop cutting thin stainless and aluminum with nitrogen at high pressure, a window can last a month or more. A window that is kept in service after it fogs or pits costs far more than the part: it scatters beam energy, degrades cut quality, overheats, and in the worst case cracks and lets spatter reach the focusing lens or collimator, which is a repair measured in days of downtime. This guide covers what the window does, how to know when it is done, how to change it without introducing new contamination, and how to make each one last longer. Table of Contents The Short Answer What a Laser Protective Window Does How Often Should You Replace a Laser Protective Window? Signs the Window Is Contaminated or Damaged What Contamination Does to Cut Quality and the Head How to Inspect and Replace One Correctly Reducing How Often You Replace Them Stocking the Right Spares Protective Window Problems That Look Like Something Else Protective Window Quick Reference Frequently Asked Questions The Short Answer Reger Laser services fiber laser cutting machines for fabrication shops across the country, and the laser protective window is the single most common part we ship and the single most common cause of the cut quality complaints we get called about. That is not a coincidence. It is the cheapest optic in the head, it is the one closest to the cut, and it is the one operators are most tempted to leave in place for one more shift. The short answer to how often to change it is: when inspection says so, and inspection should happen every shift. If your shop does not have a shift-start inspection habit, our post on fiber laser preventative maintenance lays out the full checklist, and the protective window is the first item on it. What a Laser Protective Window Does The beam leaves the fiber, is collimated, then focused by a lens or lens group to a spot a fraction of a millimeter wide. Below the focusing optics, the beam passes through the laser protective window, then out the nozzle into the cut. The window’s only job is to take the abuse that would otherwise reach the focusing lens: spatter blowing back up from the kerf, fume, dust from the shop air, and the occasional piece of slag flung upward when a part tips. It is a flat, anti-reflection coated piece of fused silica, sealed in a cartridge or holder so it can be swapped in a minute without opening the optical path to the shop air. Because it is flat and coated for the laser’s wavelength, a clean laser protective window is nearly invisible to the beam: transmission is well above 99 percent. Every particle, pit, or film of residue on it changes that. The energy that does not pass through is absorbed by the window, which heats, or scattered, which spreads the focused spot. Both show up in the cut long before the window looks obviously bad to the naked eye. How Often Should You Replace a Laser Protective Window? Fixed intervals are a starting point, not a rule. Here is what we see across the shops we service. Mild steel with oxygen assist, 24-hour production: inspect every shift, replace every one to two weeks. Oxygen cutting produces heavy oxide spatter that finds its way up the nozzle. Stainless and aluminum with nitrogen at high pressure: inspect every shift, replace every two to six weeks. The high-pressure gas flow keeps most spatter out of the nozzle. Thick plate, piercing-heavy nests, or a lot of small holes: shorter intervals. Every pierce throws material upward, and the window sees all of it. Galvanized, painted, or oily material: shorter intervals, because the fume is worse and it condenses on the window. Any shop with poor fume extraction or dusty air: shorter intervals for everything. The laser protective window does not wear out on a schedule. It gets contaminated by what you cut, and a shop that changes nests, materials, or assist gas will see the interval change with them. Our post on laser cutting assist gas explains why the gas choice moves the interval so much. Signs the Window Is Contaminated or Damaged Inspection takes a minute with the head’s cartridge pulled and a bright light held at an angle. Look for: Haze or a bloom across the surface that does not wipe off. Condensed fume and burned-on residue. Pits or specks, especially near the center where the beam passes. Spatter that has burned into the coating. A dark spot or ring at the center. The beam has been heating a contaminated point and the coating has begun to fail. Cracks, chips at the edge, or a cloudy edge. The window has been thermally stressed and can shatter in service. Any residue on the sealed side, which means the cartridge seal or the head is compromised and contamination is reaching the focusing optics. A window that passes all five checks goes back in. A window that fails any of them is replaced, and the failed one is kept in a labeled bag for a week in case a cut quality problem needs tracing. The machine also tells you: many fiber laser heads monitor scattered light or temperature at the protective window and raise a warning before the operator can see the problem. Do not clear that warning and keep cutting; it is the cheapest alarm on the machine. Our fiber laser troubleshooting guide covers what the other alarms mean. What Contamination Does to Cut Quality and the Head The first symptom of a contaminated laser protective window is

Industrial laser cutting machine installed on a factory floor, the kind of machine that has to be re-leveled and realigned after a move
Buying & Ownership, Maintenance & Service

How Do You Move a Laser Cutting Machine Without Losing Alignment?

Moving a laser cutting machine safely comes down to three things: planning the move before anyone touches a bolt, protecting the optics, motion system, and cooling loop during transport, and treating the reinstall as a full commissioning job instead of a plug-in. A laser that is rolled across a building or trucked across the country can arrive looking perfect and still cut out of square, because the frame settled differently, the gantry shifted on its rails, or the beam is no longer centered in the nozzle. Skipping any of those three steps is how a planned two-week move turns into a month of chasing cut quality. This guide walks through what to plan, how the machine should be prepared and rigged, what has to be finished at the new site before the machine shows up, and how it should be leveled, aligned, and tested before production parts go back on the table. Table of Contents Why Moving a Laser Cutting Machine Is Different Planning the Move Before Anyone Touches a Bolt Preparing the Machine for Transport Rigging and Transport Getting the New Site Ready Leveling, Alignment, and Test Cuts Frequently Asked Questions Why Moving a Laser Cutting Machine Is Different From Moving Other Equipment Reger Laser relocates laser cutting machines for shops that are expanding, consolidating buildings, or buying a machine out of another facility. The part most people underestimate is not the weight. It is the precision. A fiber or CO2 laser holds positional accuracy across a large bed because its frame, rails, and gantry were leveled and aligned to each other when it was installed. Lift it, set it down somewhere else, and that relationship changes. That is why a laser move has more in common with a new installation than with moving a saw or a press brake. The machine needs the same site preparation, the same utilities, and the same commissioning checks it needed on day one. Our post on fiber laser installation requirements covers the site side in detail, and most of that list applies again when the machine changes buildings. What goes wrong in a poorly planned move The frame twists because it was lifted at the wrong points or set down on an uneven floor. Rails, racks, and gantry components get damaged because the axes were not locked for transport. Dust and debris get into the beam path because the cutting head and openings were left uncovered. Lines and heat exchangers freeze and crack because coolant was left in the system during a cold trip. Cutting tables and machine settings are lost because the control was never backed up before power was pulled. None of these are rare, and every one of them is preventable with a written checklist and the right people on site for each stage. Planning the Move Before Anyone Touches a Bolt Good moves start weeks ahead. The first document to pull is the machine manual, because the manufacturer specifies the lifting points, the transport locks, and the order components should come apart. The second is a floor plan of the new location with the machine footprint, the service clearances, and the path from the dock to the final position drawn in. Doorways, turns, and overhead obstructions along that path decide whether the machine moves in one piece or several. Questions to answer during planning Does the floor at the new location meet the manufacturer’s slab and flatness requirements? Is the electrical service at the new location the correct voltage and capacity, with a disconnect installed? Where will the chiller, dust collector, and assist gas supply sit, and how long are the new runs? Will the machine travel as one piece, or come apart into bed, gantry, source, and controls? Who is rigging, who is disconnecting and reconnecting utilities, and who is doing the realignment? How long can the shop run without this machine, and where does the work go in the meantime? That last question matters more than most people expect. Planning the downtime window honestly, including time for alignment and test cuts, keeps a move from turning into a scramble. If the laser feeds automation such as a parts picker, plan that equipment into the same window, because it has to be reconnected and recalibrated to the machine as well. Preparing the Machine for Transport Preparation is where most of the risk comes out of a move. Before the machine is disconnected, run it, cut reference parts, and write down how it performs. That baseline gives you something to compare against after the reinstall, and it documents the machine’s condition in case anything is damaged in transit. A basic preparation sequence Back up the control: programs, cutting tables, parameters, and machine settings. Cut and keep reference parts in a common material and thickness, and note any existing issues. Drain the chiller and every cooling circuit in the machine, and blow the lines out if the trip passes through freezing weather. Remove or cap the cutting head and seal every opening in the beam path. Install the manufacturer’s transport locks on the gantry and axes. Disconnect and label every electrical, gas, and exhaust connection. Clear loose items, scrap, and slats from the shuttle tables. Draining coolant is the step that gets skipped most often, and it can be the most expensive one to skip. Water left in a laser source, a cutting head, or a chiller heat exchanger during a cold trip can freeze and crack components that take weeks to replace. Our laser chiller maintenance guide covers draining and refilling in more detail. Rigging and Transport A laser cutting machine should be lifted only at the points the manufacturer designates, with rigging rated for the load, by people trained to do it. Lifting at the wrong point, or letting the bed flex during a lift, is how frames get twisted. OSHA publishes guidance on crane, derrick, and hoist safety and on powered industrial trucks, and a qualified rigging company will work to those standards on your

Flat bed fiber laser cutting machine installed on a shop floor in a fabrication facility
Buying & Ownership, Maintenance & Service, Training & Safety

What Does a Fiber Laser Need to Be Installed? 7 Requirements to Check First

Fiber laser installation requirements come down to seven things: adequate and clean electrical service, dry compressed air, an assist gas supply, heat rejection through a properly sized chiller, a flat and solid floor, enough clearance for the machine plus material handling, and fume extraction with the right safety setup. Sort those out before the truck arrives and a machine goes from crate to first cut in a matter of days. Miss one and the machine sits. Most delayed installs we see are not machine problems. They are facility problems that nobody checked until the rigger was already on site. Below is what to verify, in the order it matters, with the questions to put to your electrician and your dealer well before the ship date. Table of Contents The Short Answer on What a Fiber Laser Needs A fiber laser is not a plug-in tool. It is a system that pulls significant three phase power, needs compressed air at a specified pressure and dryness, consumes assist gas, rejects a large amount of heat into a chiller, and has to sit dead flat and stay that way. It also needs room around it for sheets going in and parts coming out, and it produces fume that has to be captured. Every machine model publishes its own numbers for all of this. Do not work from a rule of thumb you read somewhere, and do not assume a new model matches the machine it replaced. Get the specification sheet for the exact machine and configuration you are buying, hand it to your electrician and your air and gas suppliers, and let them tell you what has to change. That is the whole job, and it is straightforward when it happens twelve weeks out instead of the week of delivery. What follows is the checklist to work through, and what tends to go wrong in each area. Requirement 1: Electrical Service and Power Quality This is the most common reason a fiber laser installation slips. A modern fiber laser plus its chiller and dust collector represents a serious load, and a lot of shops discover their existing service does not have the headroom once everything runs at once. Four things to confirm before ordering anything. First, the incoming service capacity, meaning whether there is enough amperage available at your panel with everything else in the shop running, not just on paper. Second, the voltage and phase the machine expects, since a mismatch means a transformer, and a transformer means lead time and floor space. Third, the disconnect and breaker sizing and where the disconnect has to be located relative to the machine. Fourth, grounding, which fiber lasers are particular about because the drives and the controller are sensitive to a poor ground. Power quality matters as much as capacity. Voltage sag when a large compressor kicks on, harmonic distortion from other drives in the building, and phase imbalance all cause faults that look like machine problems and are not. If your shop has a history of nuisance faults on other CNC equipment, get a power quality survey done before the laser lands rather than chasing it afterward. Work from the National Electrical Code and let a licensed electrician size the installation. One practical note: run the conduit and set the disconnect before the machine arrives. Riggers can place a machine in a morning. Waiting on an electrician afterward costs days. Requirement 2: Clean, Dry Compressed Air Compressed air runs the cutting head, the nozzle changer, the pneumatics, and on many machines it doubles as an assist gas for thinner material. It has to arrive at the pressure the machine specifies and it has to be dry. Dryness is where shops get hurt. Ordinary shop air carries water and compressor oil. Send that into a cutting head and you contaminate the protective window, which then absorbs energy, overheats, and fails, sometimes taking more expensive optics with it. The fix is a refrigerated or desiccant dryer sized for your actual air demand, plus coalescing filtration, plus a drain that works. Check the machine specification for the required dew point and filtration level and match it exactly. Volume is the second issue. A compressor that keeps up with hand tools may not keep up with a laser running air assist continuously. Size for the machine demand plus everything else in the shop running at the same time, and give it a receiver tank so short peaks do not drag the pressure down. Air quality problems show up as consumable cost first. If you are burning through protective windows and nozzles faster than expected, air is the first place to look, ahead of nozzle condition or cutting parameters. Requirement 3: Assist Gas Supply and Storage Assist gas is a facility decision, not just a consumable line item, because how you supply it changes what has to be built before the machine runs. Nitrogen for oxide free edges on stainless and aluminum, oxygen for thicker carbon steel, and air for lighter gauge each have different supply implications. High pressure cylinders are the simplest starting point and the most expensive way to run volume. Bulk liquid means a tank outside, a pad, a vaporizer, and a supplier agreement. On site nitrogen generation means a generator, more compressed air demand, and attention to purity, since nitrogen purity directly affects edge quality on stainless. Whichever route you choose, the piping run to the machine has to be sized for the flow the cutting head demands at pressure. Undersized line is a classic mistake: pressure reads fine at the manifold with the machine idle, then drops the moment cutting starts, and the edge quality goes with it. Regulators, manifolds, and cylinder or tank location all need to be settled before the install date, and outdoor bulk storage frequently involves a permit and a lead time measured in weeks. If you are still deciding, our breakdown of assist gas selection covers the tradeoffs between nitrogen, oxygen, and air by material and thickness.

Scroll to Top
0

No products in the cart.

No products in the cart.